Shower Slider Rail Kits vs Shower Rigid Riser Kits: A Comprehensive Comparison
In the world of home improvements, it’s often the details that make all the difference. While picking chic tiles or a stylish shower curtain can elevate your bathroom aesthetics, choosing the perfect shower kit can truly transform your daily shower into an unparalleled experience.
In this comprehensive comparison, we explore the fine points of two main options: slider rail kits and riser shower kits.
Understanding Shower Kits: The basics
When it comes to shower kits, it’s not just about the looks; functionality plays an equally significant role. Most kits come with a shower head, hose, and a mechanism to adjust both height and angle. There are two main types to consider: the flexible shower slider rail kits and the more traditional riser shower kits.
What is a shower slider rail kit?
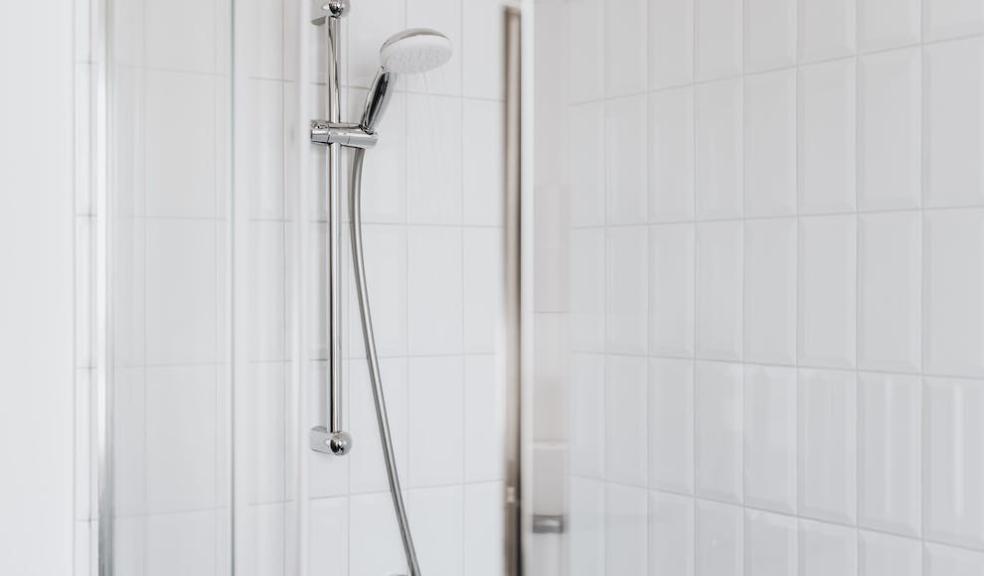
A shower slider rail kit is a versatile and adjustable system that allows you to slide the shower head up and down a rail for preferred height positioning. This type of kit is particularly beneficial for households with individuals of varying heights. They often come with a flexible hose, enabling you to use the shower head as a handheld unit as well, which further adds to their versatility.
Features of shower slider rail kits:
- Adjustable Height: Accommodates everyone from children to adults.
- Flexible Hose: Provides added functionality and ease.
- Versatile Design: Comes in a range of styles and finishes to suit varied tastes.
From a design perspective, these kits integrate seamlessly into contemporary settings, thanks to their sleek lines and chrome finishes.
What is a rigid riser shower kit?
In contrast, a rigid riser shower kit offers a more fixed setup. The shower head is attached to a rigid vertical pole, and its height is generally not adjustable. While this could be a limitation for multi-user households, it provides a more permanent, traditional look that some homeowners seek.
Features of rigid riser shower kits:
- Fixed Height: Best suited for individual use or couples of similar height.
- Traditional Appeal: Harmonise well with classic interior themes.
The Ultimate Guide to Shower Heads and Valves: Elevate Your Shower Experience
How to choose a shower head for both kits
While the structure of your shower kit is vital, it’s the shower head that truly defines your showering experience. The best part? Both shower slider rail kits and rigid riser kits allow for a variety of options, ensuring there's something for every preference and budget.
Popular Types of Shower Heads
- Standard Wall-Mount Heads: These are the classic shower heads most commonly found and are often suitable for both types of kits.
- Rainfall/Rain Showers: These are wider heads that disperse water in a manner that mimics natural rainfall, offering a luxurious spa-like experience.
- Handheld Shower Heads: Ideal for shower slider rail kits, handheld shower heads can be detached and used as per your convenience.
- High-Pressure Heads: Perfect for homes with lower water pressure; they use specialised flow restrictors to boost the water pressure.
Factors to Consider
- Water Pressure: Ensure that the shower head you choose is suitable for the water pressure in your home.
- Water-Saving Features: Eco-conscious users should look for shower heads with water-saving technologies like flow restrictors or aerators.
Bath & shower valve considerations
Now that we've tackled the shower head, let's move on to the often-overlooked yet crucial part of your shower setup - valves and controls.
Shower Slider Kits: A Symphony of Modern Controls
If you're inclined towards modern functionality, shower slider kits offer excellent compatibility with modern valves, especially thermostatic ones. A thermostatic mixer shower valve maintains your chosen water temperature irrespective of other water activities in the house, such as flushing a toilet. They can be adjusted with precision, ensuring a safe and comfortable showering experience.
Rigid Riser Kits: Tradition Meets Technology
For those who love the traditional look, rigid riser kits often come with in-built valves that match the overall design aesthetic. However, don't be fooled by their old-school appearance; many traditional designs now incorporate modern features like anti-scalding technology.
Installation and Practical Considerations
So you've weighed your options and made your choice. Now comes the essential part - installation. Whether you're an experienced DIY enthusiast or you plan on hiring professionals, understanding the process can make a big difference to having a seamless process.
The installation processes for both kits are similar, but there are a few key differences:
The installation process of a shower slider rail kit
- Locate the Position: Decide where you'd like the slider rail to be and mark this on the wall.
- Measure Twice, Drill Once: Take precise measurements to ensure your holes are where they should be. Use a level for accuracy.
- Drill Away: Carefully drill holes into the wall where you marked.
- Insert Wall Plugs: Place wall plugs into the holes for added stability.
- Screw the Brackets: Attach the brackets using the screws provided.
- Attach the Rail: Slide the rail into the brackets and secure it.
- Fit the Shower Head: Attach your chosen shower head to the hose and slide it onto the rail.
- Check & Test: Make sure everything is secure and tight. Turn on the water to test it out!
Steps to install a rigid riser shower kit
- Assemble the Components: Often rigid riser kits come partly assembled. Complete any remaining assembly before mounting.
- Mark the Spot: Determine the height and location for your rigid riser, marking it clearly on the wall.
- Ready, Steady, Drill: Drill holes into the wall where the riser will attach.
- Secure the Brackets: Attach the wall brackets using screws and wall plugs.
- Mount the Riser: Carefully lift the rigid riser into the brackets.
- Tighten Everything: Use a wrench or adjustable spanner to make sure all the connections are tight.
- Attach the Shower Head: Screw the shower head onto the top of the riser, using plumber's tape for a snug fit.
- Test Run: Turn the water on to ensure there are no leaks and that the setup is stable.
Tips and hacks for a smooth installation process
Firstly, it’s crucial to assess your existing plumbing setup. Understanding what you're working with lays the groundwork for a hassle-free installation. From the water pressure to the location of pipes and fixtures, having this knowledge ensures you won’t run into unexpected issues midway. Next, inventory management is key. Before you start, ensure that you have all the fixtures and fittings that you'll need for the installation. There’s nothing more frustrating than having to pause the process to run out and buy a missing piece.
Accuracy is another must, and this is where a level comes into play. Using one not only ensures your rail is perfectly horizontal but also adds a professional touch to your installation. If your bathroom features tiled walls, take an extra precaution when drilling. Use a tile-drilling bit to safeguard against cracking the ceramic, a common mishap that can derail your installation project and add unnecessary cost and stress.
Lastly, while taking the DIY route can be fulfilling, it's not for everyone. If you're tackling a complex setup or you're not fully confident in your DIY abilities, don't hesitate to call in the professionals. The peace of mind and quality of workmanship can be well worth the investment.
Final thoughts: Making the right choice
Shower slider rail kits offer unparalleled functionality and adaptability, making them the preferred choice for families. Rigid riser kits, meanwhile, provide an air of luxurious permanence and are a favourite among those seeking to add a touch of timeless elegance to their bathrooms. Ultimately, your choice should reflect not just your aesthetic predilections but also your lifestyle needs. Discover your perfect shower kit at HOUSE OF ENKI today!


